业务代码开发
业务开发时需要在 app/views/ms_jk 目录下开发接口,接口开发完成后需要在 app/views/ms_jk/__init__.py 引用该接口。
如果需要完整的验证调用过程,还需要在平台配置该APP。
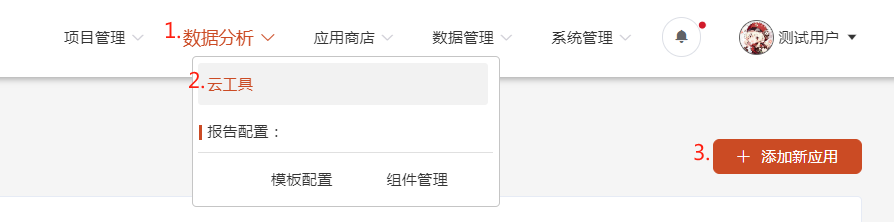
应用配置
平台上配置APP:
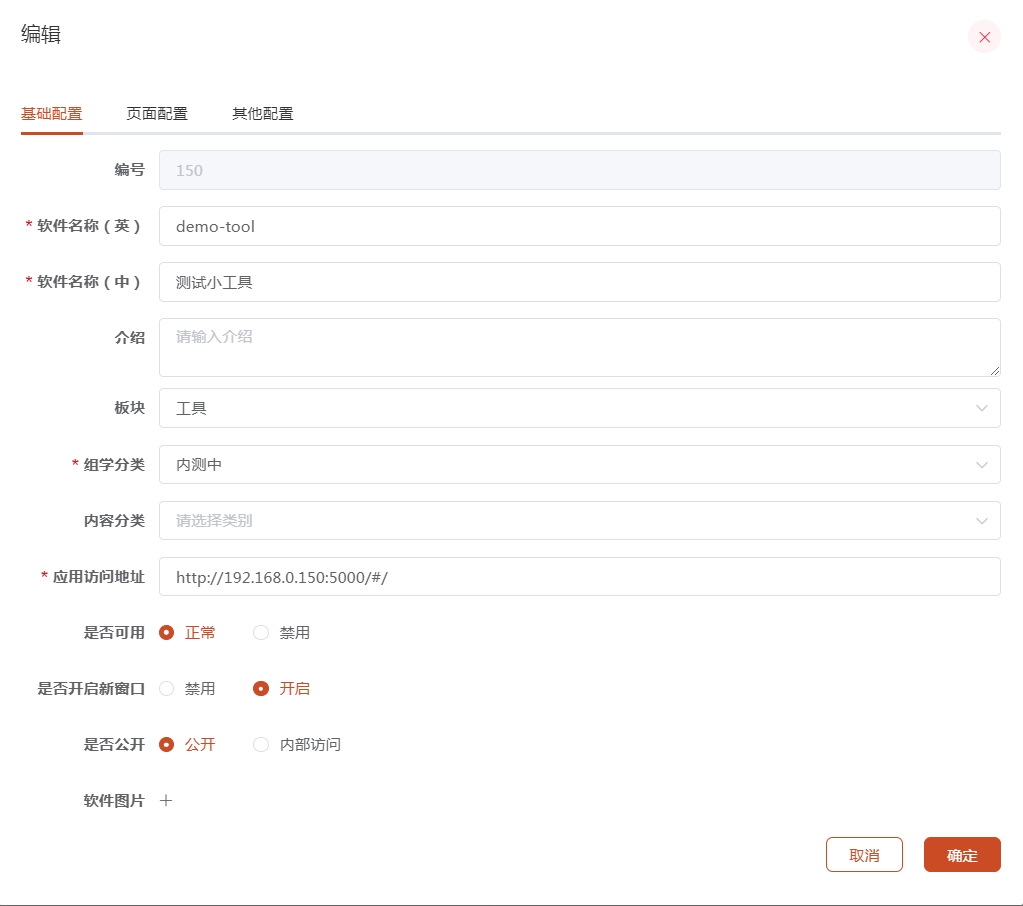
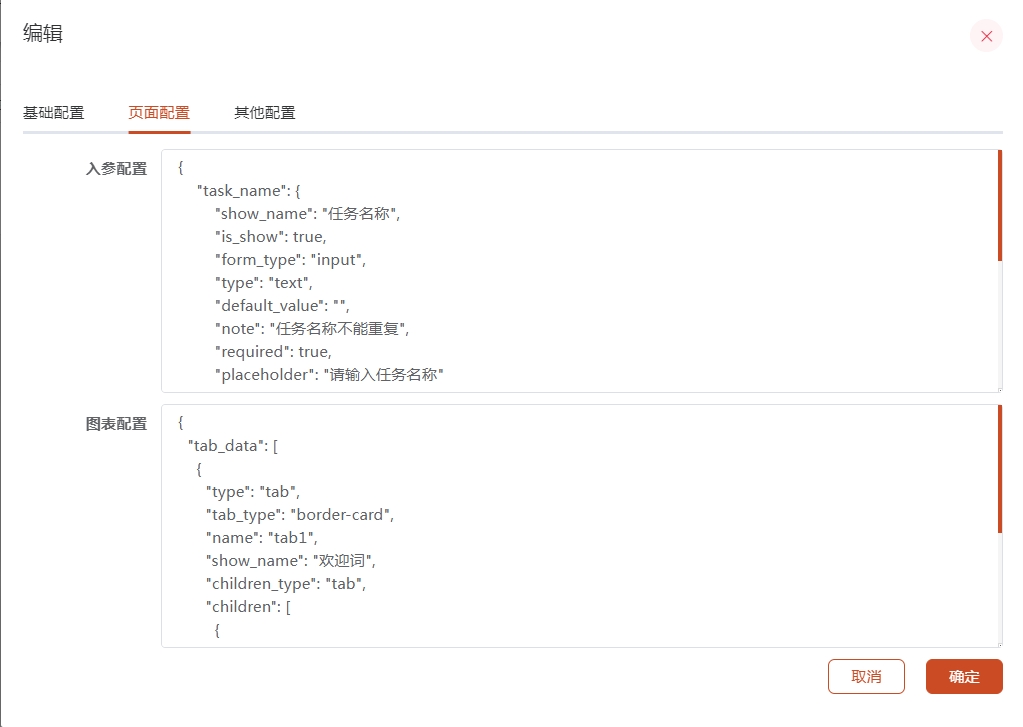
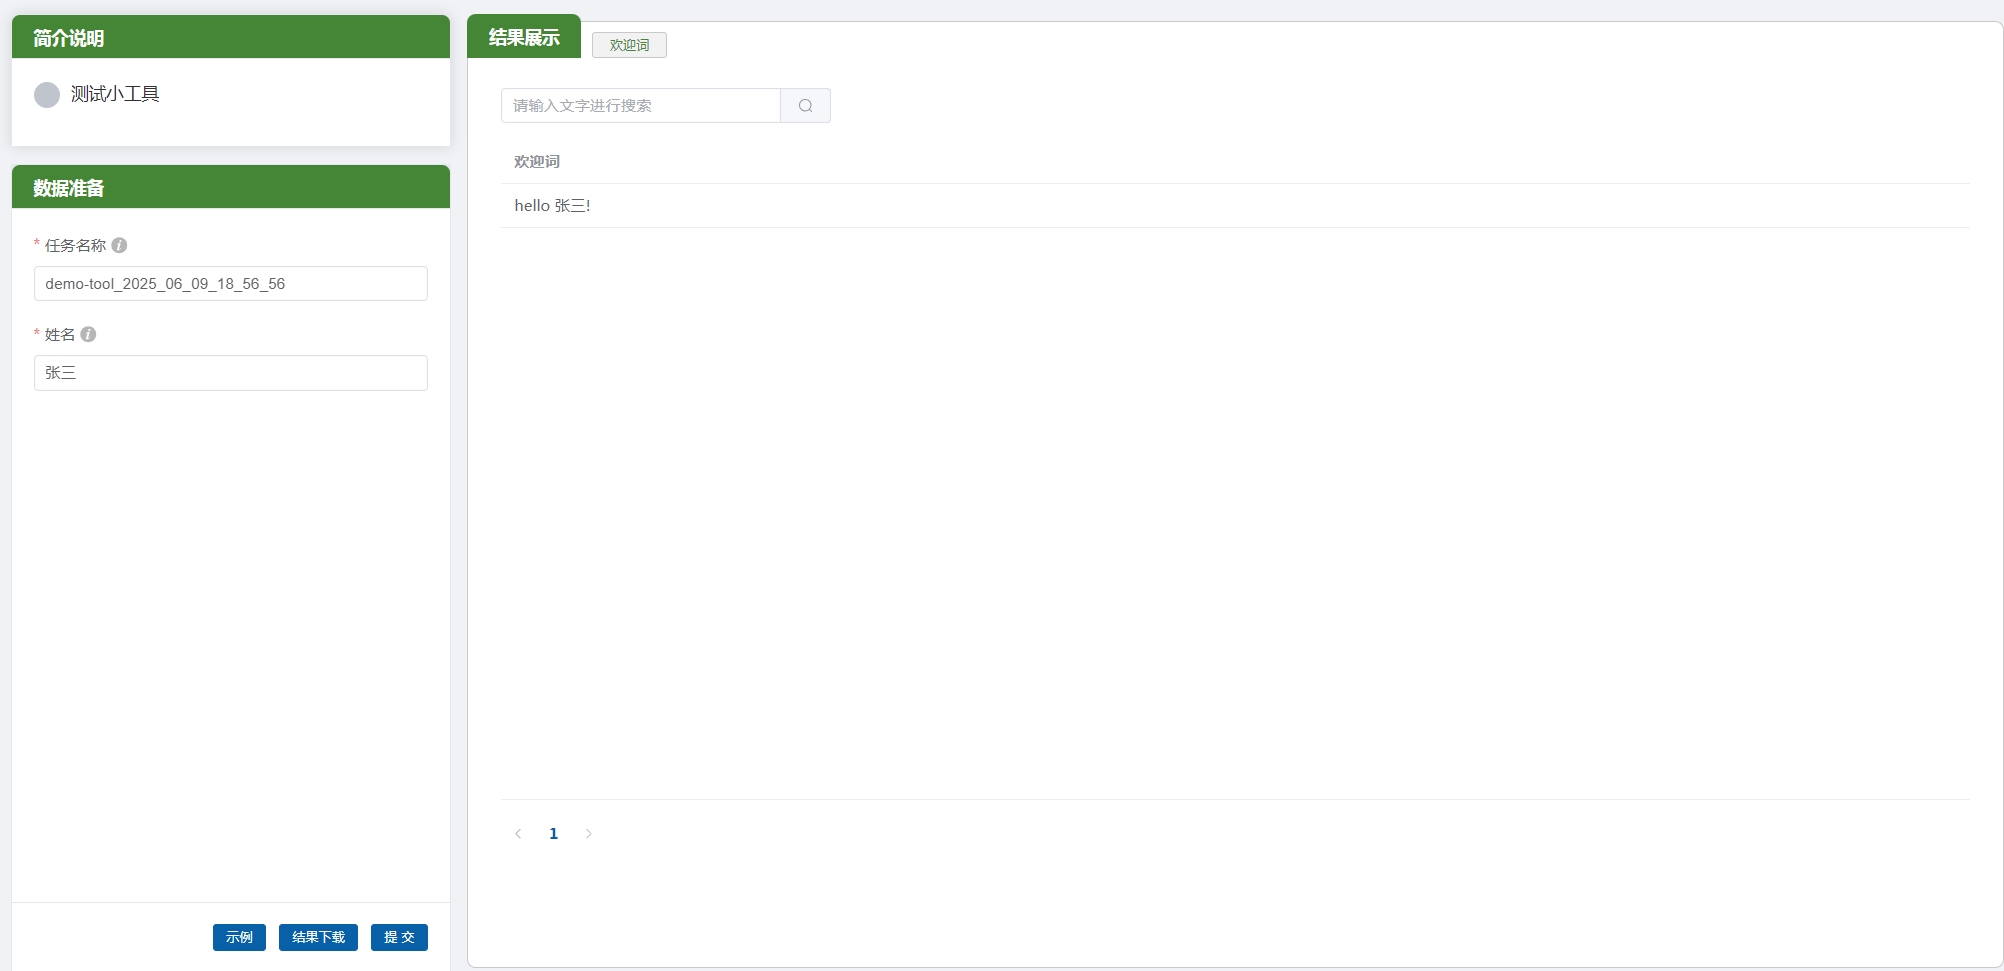
这里仅对如下几个参数进行示例配置说明,后续会有单独章节详细说明。 - 应用访问地址: 访问应用的URL(示例中为: http://192.168.0.114:5000) - 入参配置: 前端界面左侧入参配置,示例见下 - 图表配置: 前端界面右侧图表配置,示例见下
入参配置
{
  "task_name": {
    "show_name": "任务名称",
    "is_show": true,
    "form_type": "input",
    "type": "text",
    "default_value": "",
    "note": "任务名称",
    "required": true,
    "placeholder": "请输入任务名称"
  },
  "name": {
    "show_name": "name",
    "is_show": true,
    "form_type": "input",
    "type": "text",
    "default_value": "张三",
    "note": "你的名字",
    "required": true,
    "placeholder": "请输入"
  }
}
图表配置
{
  "tab_data": [
    {
      "type": "tab",
      "tab_type": "border-card",
      "name": "sayhello",
      "show_name": "示例",
      "children_type": "other",
      "children": [
        {
          "type": "Tables",
          "api_url": "/ms_jk/sayhello",
          "handle_function": {"start_symbols":"虚拟机器人小爱对你说"},
          "data_path": "data",
          "chart_parameters": {}
        }
      ]
    }
  ]
}
接口开发
在上一小节配置了展示的tab内容,其调用的接口配置的是 /ms_jk/sayhello", 现在我们开始配置该接口。
终端执行 vim app/views/ms_jk/sayhello.py, 编辑内容如下:
#!/usr/bin/env python
# -*- coding:utf-8 -*-
from app.views.ms_jk import bp
from flask import request, jsonify
from hippo.web import DataAnalysisTableRecord
from hippo.log_tracking import platform_monitor

@bp.route("/sayhello", methods=['POST'])
@platform_monitor()
def sayhello():
    record = DataAnalysisTableRecord(__file__)

    name = record.get_input_param("name")
    start_symbols = record.get_plot_param("start_symbols",default="虚拟bot")
    if start_symbols is not None and not str(start_symbols).endswith(":"):
        start_symbols = f"{start_symbols}:"

    return jsonify(data={'index': [0, 1], 'columns': ['Demo结果展示'], 'data': [[f"{start_symbols} hello,{name}!"]]}), 200
接口开发完毕,注册该接口,终端执行 vim app/views/ms_jk/__init__.py, 编辑内容如下(末尾注册接口即可):
#!/usr/bin/env python
# -*- coding:utf-8 -*-

from flask import Blueprint

bp = Blueprint('views_bp', __name__)

from .submit import submit
# 需要将开发的接口导入
from .sayhello import sayhello
至此,常规APP开发完毕,重启服务后,访问界面点击提交即可